Baguette
Baguette
Recipe:
A crunchy baguette is definitely one of the most delicious, fun and versatile breads to make, but also one of the most challenging. What could be so difficult when combining simple ingredients such as flour, water, salt and yeast? Although a good baguette requires a two day process and close attention to detailed steps, it is well worth making. Still learning so much. Let's get started!
Supplies:
- The Gusto Wood Fired Oven
- Infrared thermometer
- Food safe container with a lid
- Couche
Ingredients:
For the Poolish
-
300 grams King Arthur All Purpose Flour
-
300 grams water
-
Less than 1/8th teaspoon active dry yeast
Poolish is a pre-ferment that adds great flavor to the final product, but without the sour undertone imparted by natural leaven. Poolish gives the dough an increased benefit of extensibility which in turn creates an open, irregular crumb, as well as a thin, very crispy crust.
For the Final dough
- 650 grams King Arthur bread flour
- 350 grams King Arthur All Purpose flour
- 1 teaspoon Barley Malt Syrup - optional, but provides nutrients to the yeast
- 24 grams salt
- 6 grams active dry yeast (about 1.5 teaspoon)
- 580 grams water (reserve a small amount for later)
- 150 grams 'pasta di riporto' or leftover dough from a previous bake (optional)
- All of the poolish from above
Directions:
- First thing in the morning begin by preparing the POOLISH. Simply combine 300 grams flour, 300 grams water plus a very small amount of yeast. Mix thoroughly. Cover and set aside all day at room temperature for 12 to 16 hours. The poolish will be ready when jiggly, bubbly, airy, and slightly more than tripled in size.
- When ready to mix the final dough, place the bread flour and All Purpose flour in a large capacity bowl.
- Pour the poolish and water into the bowl, as well as the barley malt syrup, yeast, and leftover dough from the previous bake (pasta di riporto, optional). One can easily facilitate the sticky poolish to come unglued from the container by gently pouring the water all around the edges of the poolish. Make sure to reserve just a little water (about 2 tablespoons) for later in order to incorporate the salt into the dough.
- Begin to work the dough until all dry ingredients are well incorporated and no dry flour is present.
- After a short rest, sprinkle the salt over the top of the dough and pour the remaining reserved water over it. Work the salt into the dough by using the pinching method, as shown in the video. The dough will look shaggy and lumpy at this point. No worries!
- Cover the dough and allow it to rest for 10-15 minutes. During this resting period the dough will relax, and the flour will have time to hydrate as gluten develops.
- When 15 minutes are up, work the dough. Once again give the dough a set of stretch and folds, as shown in the video. The dough can also be placed on a lightly floured work-surface to knead.
- Gluten development will become more noticeable, and the dough will begin to have a much smoother consistency and will become nice and elastic. Cover once again and allow the dough to rest an additional 15 minutes.
- When time is up, work the dough for the last time before transferring it into a food safe container with a lid.
- Allow the dough to sit on the countertop for about ½ hour before placing it in the refrigerator overnight. When refrigerated overnight for the final proof, the dough should rise about 50% of its original size.
- The next day, preheat the The Gusto Wood Fired Oven to 500°F - 260°C. Make sure to place a pan on the bottom rack to heat up with the oven. This is where hot water will be poured in order to create steam once the baguette are placed inside the oven.
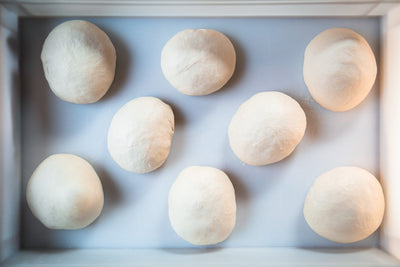
- Take the dough out of the refrigerator and keep out for at least 1/2 hour before dividing, scaling and pre-shaping. When time is up allow the dough to slowly come out of the container on the clean, lightly floured work-surface.
- Divide the dough into portions each weighing 350 grams. (The weight of each baguette will fall roughly to 300 grams after baking) Place the small leftover dough into a covered food safe container for the next bake. This is the 'pasta di riporto'.
- Pre-shape the dough, as shown in the video. Tell the dough who is boss as you pre-shape it into a rough cylinder. Avoid degassing the dough. Cover loosely and allow to rest for at least 30 minutes.
- When time is up uncover the dough. Flip each pre-shaped dough upside down on a very lightly dusted work-surface. Fold the long edges into the center of the cylinder and make sure to seal well. These folds will create tension into the dough. Process is shown step by step in the video.
- Transfer each baguette on a well floured couche or baker's cloth, with seams pointing up. Fold up some of the couche between each baguette so that they are separated when they proof. Cover the baguette loosely, and allow to rise for about 40-60 minutes max, or until the dough has sufficiently proofed. A good indication is to gently press on the dough with one finger. If the indention slowly and ever so slightly bounces back it is ready. If the dough bounces back too quickly, it is a good indication that they need to proof a little longer, maybe 10-15 minutes.
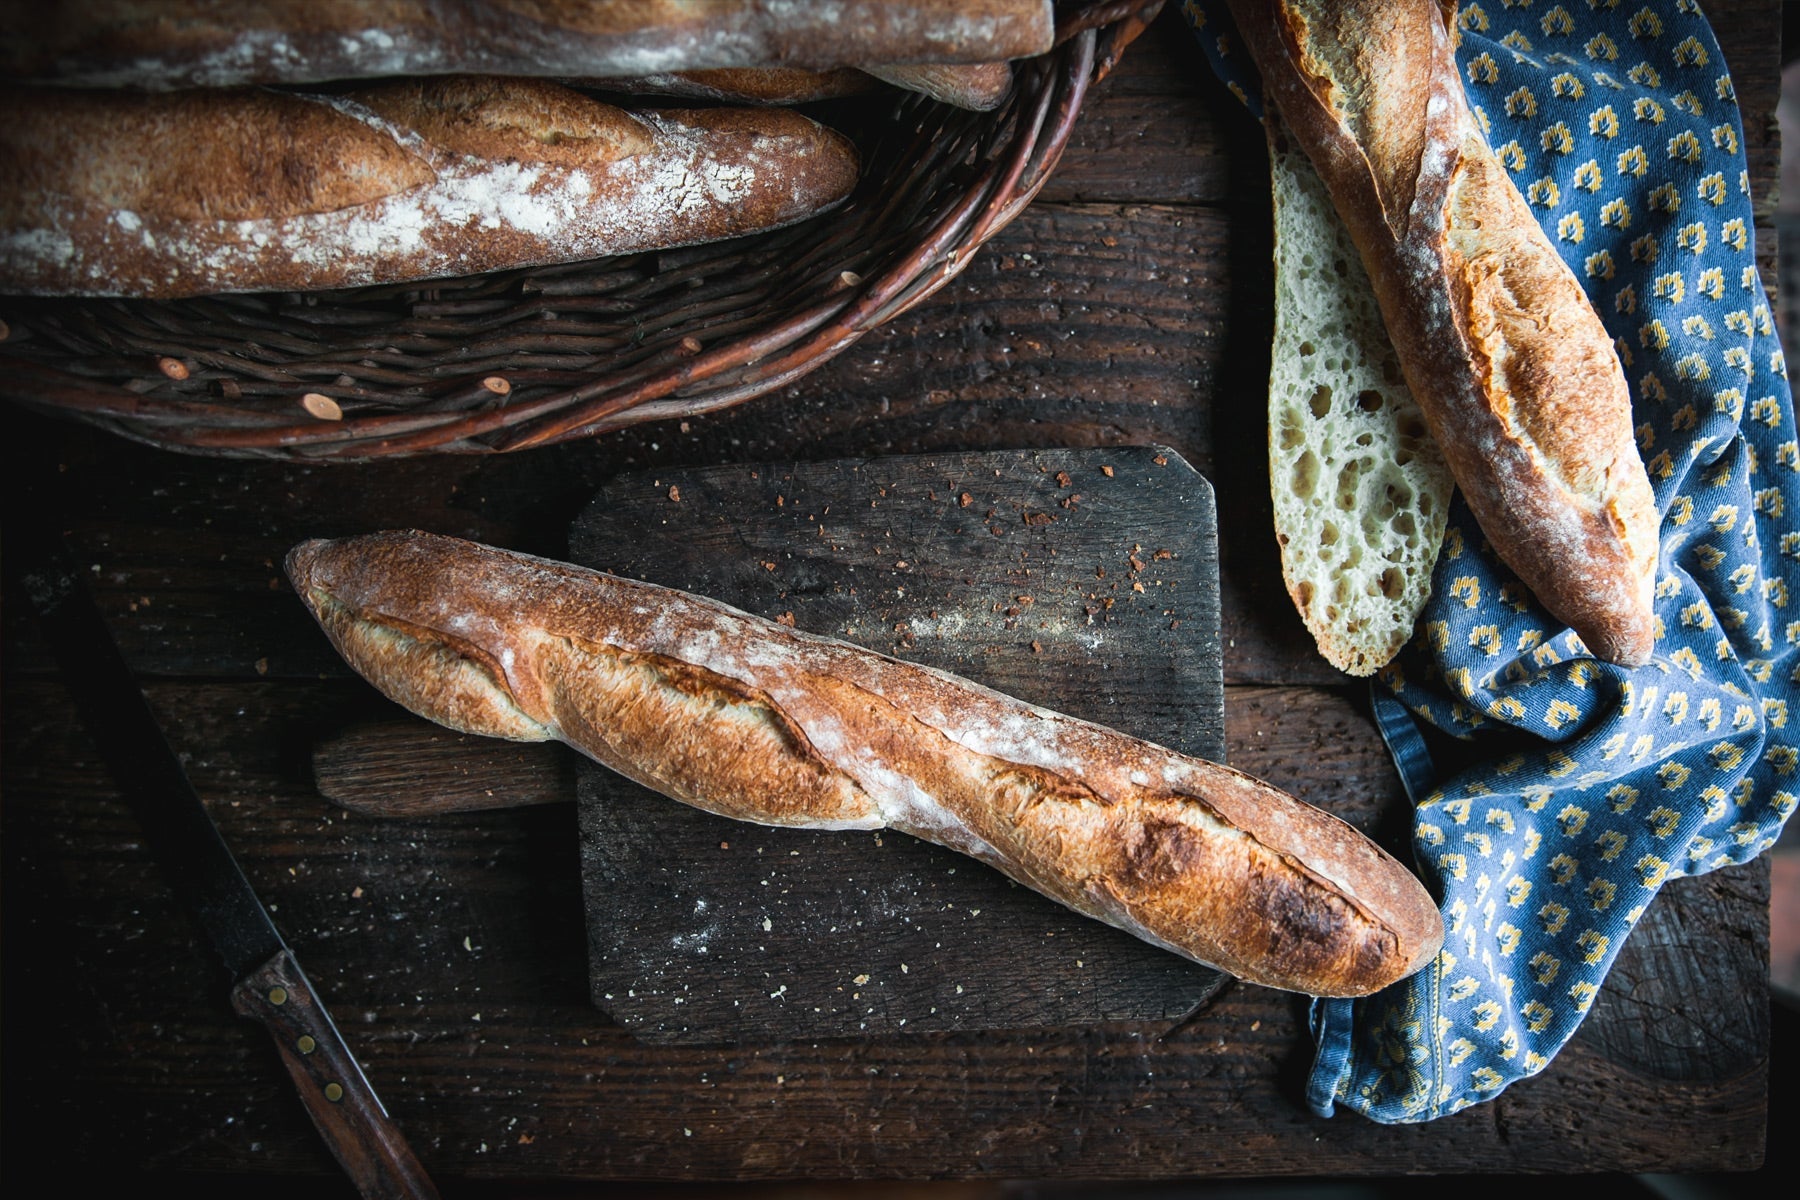
- Transfer the baguette on a dusted peel seam side down, as shown in the video. With the help of a dough lame or blade, slash or score each baguette in the center third of the surface, making sure to overlap each cut, as shown in the video. The curved blade should run parallel under the surface of the baguette.
- Open the oven door, and with a quick and decisive movement slide the baguettes onto the hot stone as the peel is pulled back and out. Immediately pour hot water into the pan below which in turn will fill the oven chamber with steam. Be very careful as steam is extremely hot. Swiftly close the door and allow the oven to do its magic. Initial oven temperature is about 475°-500°F - 246°- 260°C. (We also had fun using the steam injector which my husband purchased to kill weeds in the garden).
- After 10-15 minutes the baguettes will have experienced a nice oven spring. Remove the water pan from the oven, and allow the remaining steam to escape.
- Close the door once again and finish baking at 475°F - 260°C for an additional 10-15 minutes or until golden brown. Let rest for a few minutes before before cutting into it. Enjoy!
Buon Appetito!
Subscribe to our YouTube channel for more videos!
Follow us on Instagram and tag us with your culinary magic! We would love to see how you make this recipe!
@FontanaForniusa #fontanaovens
@inside.our.kitchen #insideourkitchen